three.js - 지오메트리 (1) : BoxGeometry, WireframeGeometry, EdgesGeometry
2026.09.06 · 4분 읽기 · 조회 0
Geometry
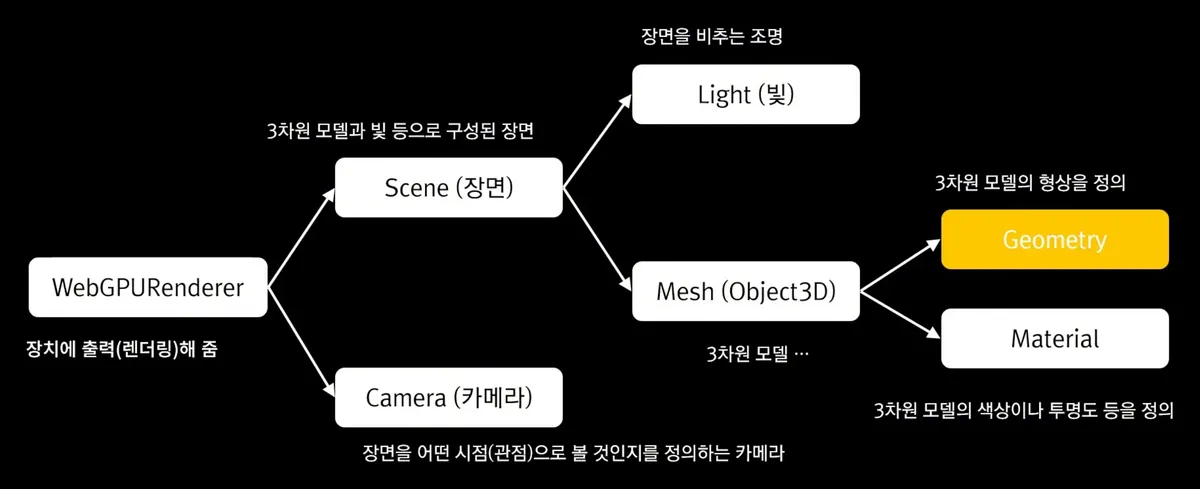
Geomotry는 Mesh를 구성하는 요소 중 하나이다.3차원 모델의 형상을 정의한다.
Geometry의 attribute 데이터
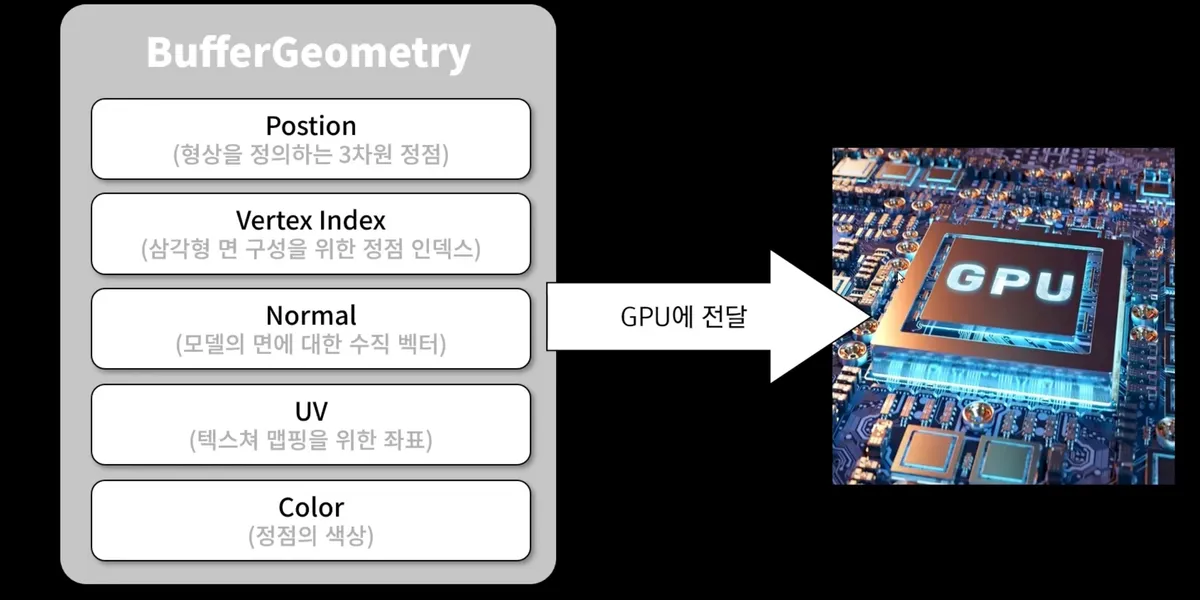
Geometry의 클래스는 BufferGeometry이다.
이것은 총 5개의 attribute로 구성되어 있다.
Position
모델 형상을 정의하는 3차원 정점에 대한 배열이다
Vertex Index
삼각형 면을 구성하는 정점 인덱스 배열이다. 3차원 모델은 기본적으로 삼각형 면으로 구성되어 있다.
Normal
모델의 면에 대한 수직 방향의 벡터에 대한 배열이다.
UV
텍스쳐 매핑을 위한 2차원 좌표에 대한 배열이다.
Color
각 정점에 대한 색상 배열이다.
해당 Attribute 데이터는 GPU의 메모리에 전달되어 사용될 수 있다.
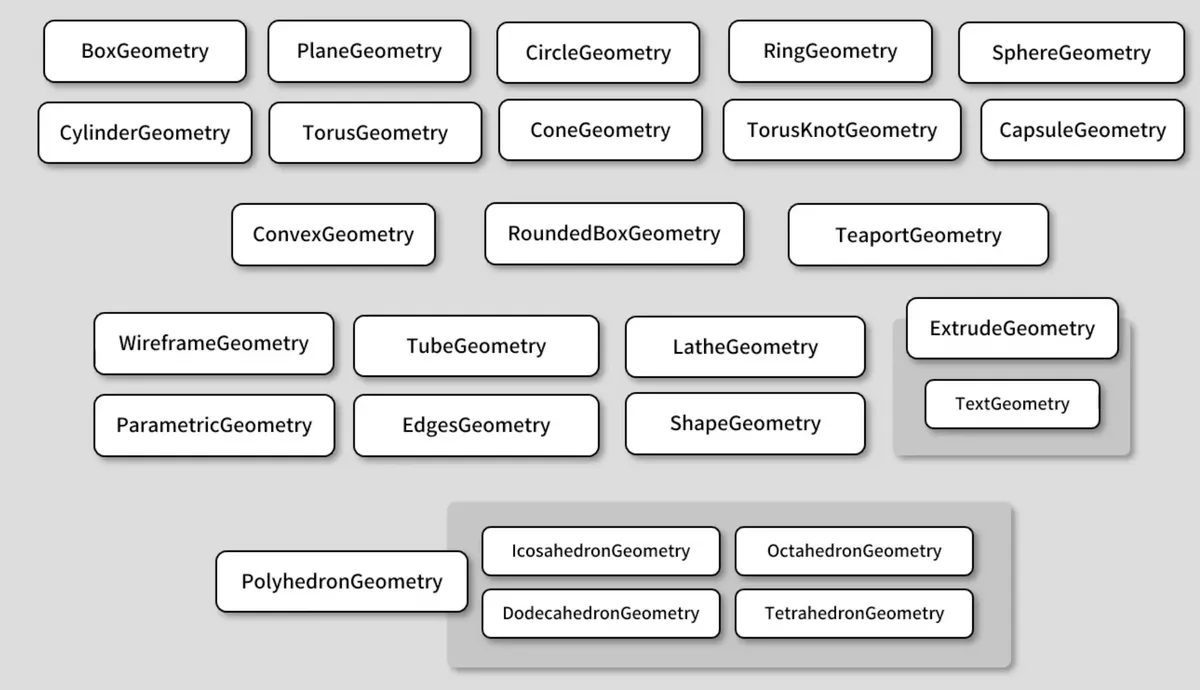
three.js는 미리 정의된 지오메트리를 클래스로 제공한다.
코드 써보기
git clone https://github.com/GISDEVCODE/threejs-webgpu-with-typescript-starter .코드 작성 시작을 위해 해당 레포를 가져온다.
private setupModel() {}기존의 박스 모델을 없애기 위해 setupModel 메서드 내부를 비워준다.
update() {
  this.timer.update();
  const delta = this.timer.getDelta();

  // this.mesh.rotation.y += delta;
}
update 메서드 내부의 로테이션도 없애준다.
BoxGeometry
  private setupModel() {
    const geometry = new THREE.BoxGeometry();
    const matFill = new THREE.MeshBasicMaterial({
      color: 0x414141,
    });
    const mesh = new THREE.Mesh(geometry, matFill);

    this.scene.add(mesh);
  }
해당 코드를 추가해주자.
three.js 사이트에서 BoxGeometry를 검색해 문서를 찾아가보면.
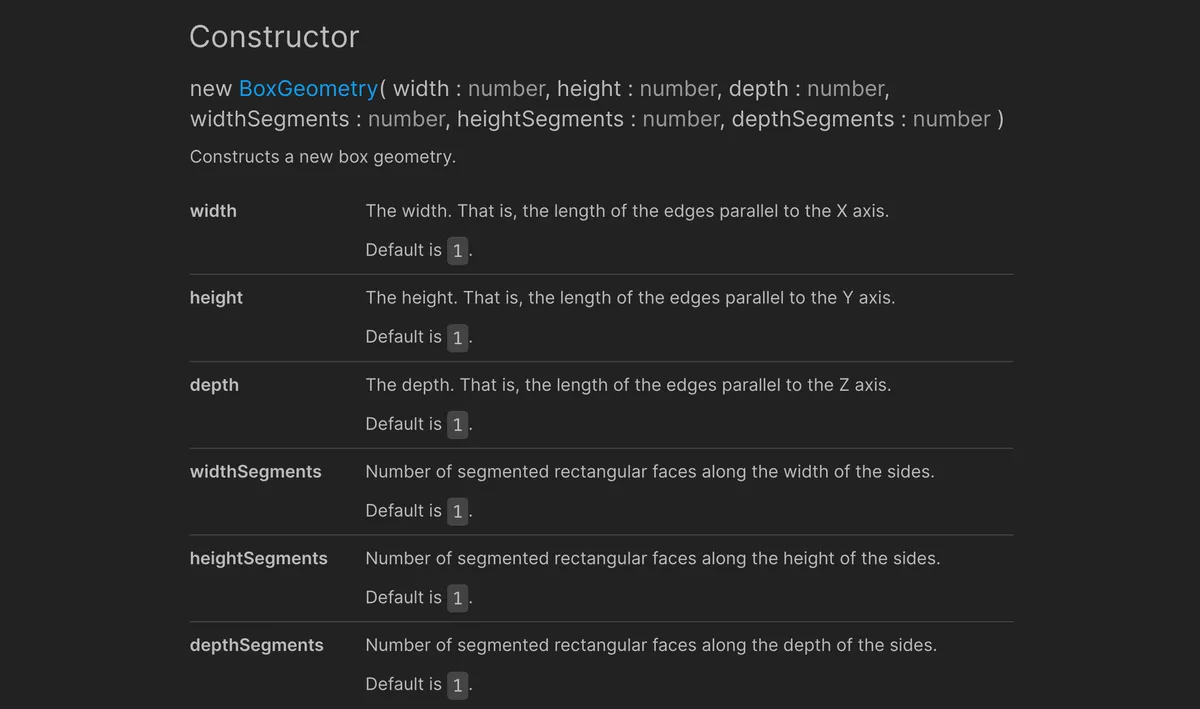
해당 클래스의 생성자를 볼 수 있다.
width: 가로방향에 대한 길이height: 세로방향에 대한 길이depth: 깊이 방향에 대한 길이widthSegments: 가로 방향에 대한 분할 수heightSegments: 세로 방향에 대한 분할 수depthSegments: 깊이 방향에 대한 분할 수
이다. 각 인자의 기본 값은 모두 1이다.
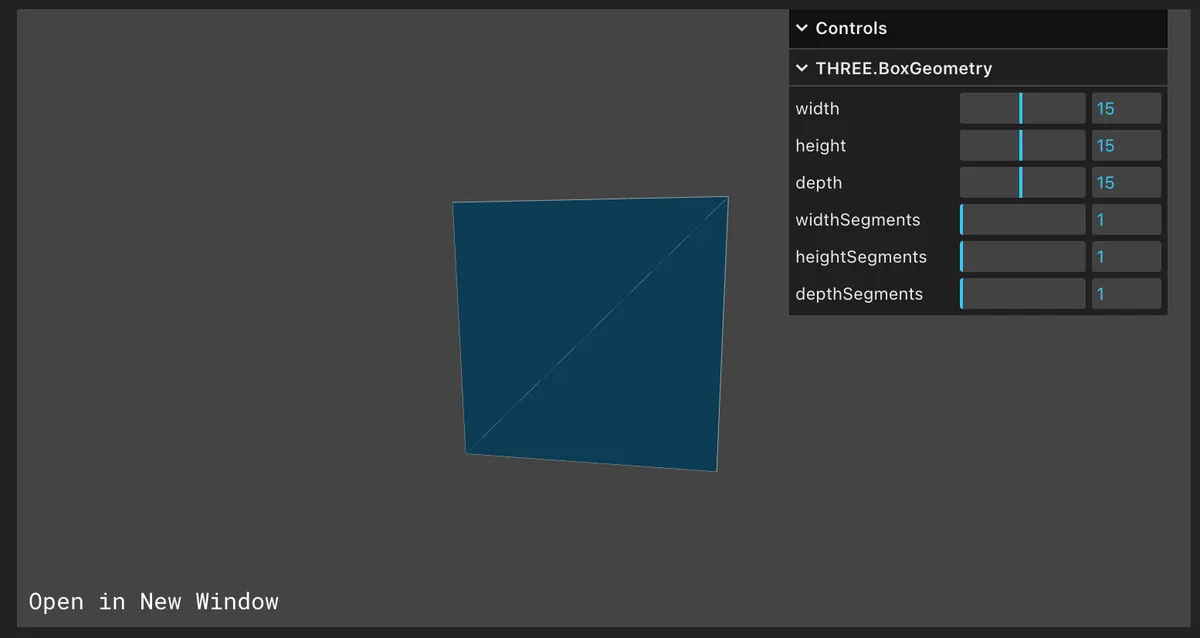
해당 문서의 상단에 각 값들을 변경해볼 수 있는 캔버스가 있다.
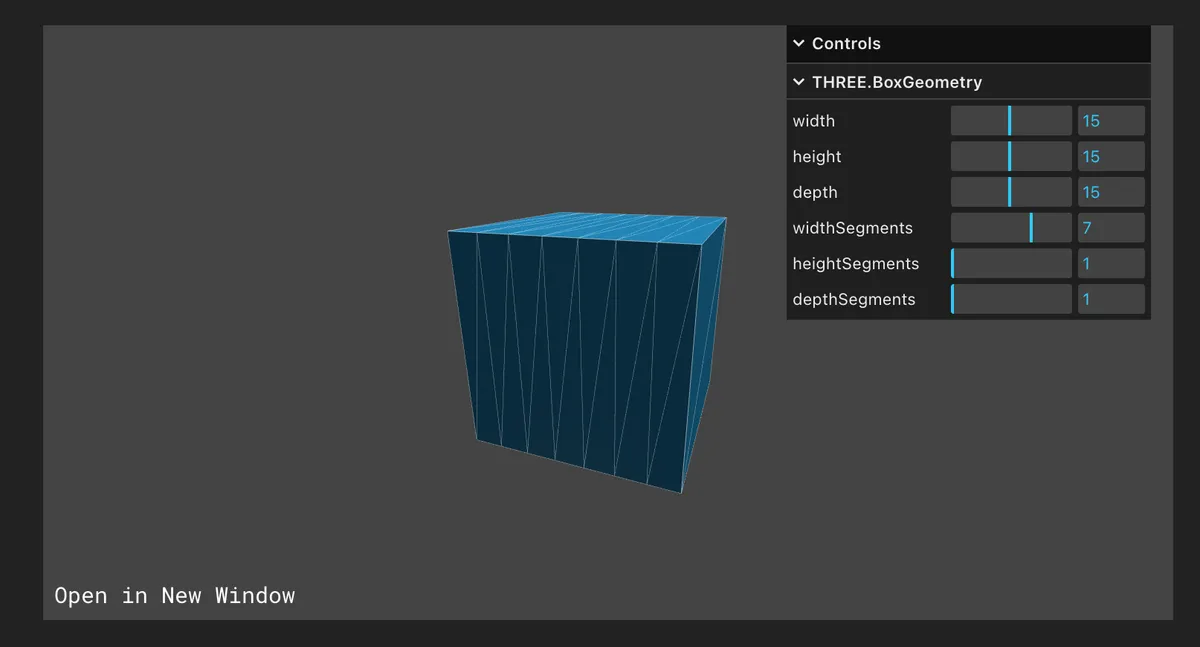
segment값을 변경해 보면 이런 식으로 영역이 분할되는 것을 볼 수 있다.
  private setupModel() {
    const geometry = new THREE.BoxGeometry();
    const matFill = new THREE.MeshBasicMaterial({
      color: 0x414141,
    });
    const mesh = new THREE.Mesh(geometry, matFill);

    this.scene.add(mesh);
  }
이전의 코드는 아무 값도 지정하지 않았으므로 전부 1로 설정되어 있을 것이다.
또한 mesh 를 생성 할 때, 재질을 MeshBasicMaterial로 써줬는데, 해당 재질은 광원의 영향에 영향받지 않고 지정한 색상값으로만 렌더링하도록 한다.
외곽선 추가
해당 모델을 좀 더 자세히 파악하기 위해 mesh에 대한 외곽선을 표시해주자.
  private addOutline(geometry: THREE.BufferGeometry) {
    const matLine = new THREE.LineBasicMaterial({
      color: 0xffff00,
    });

    const outline = new THREE.LineSegments(geometry, matLine);
    this.scene.add(outline);
  }
외곽선을 표시하는 메서드를 추가한다.
LineSegments 클래스에 추가하는 재질은 LineBasicMateria 처럼 Line 계열로 설정해주어야 한다. mesh와 line의 렌더링 방식이 많이 다르다.
  private setupModel() {
    const geometry = new THREE.BoxGeometry();
    const matFill = new THREE.MeshBasicMaterial({
      color: 0x414141,
    });
    const mesh = new THREE.Mesh(geometry, matFill);

    this.scene.add(mesh);
    // 윤곽선 그리기 추가
    this.addOutline(geometry);
  }
외곽선을 그려준다.
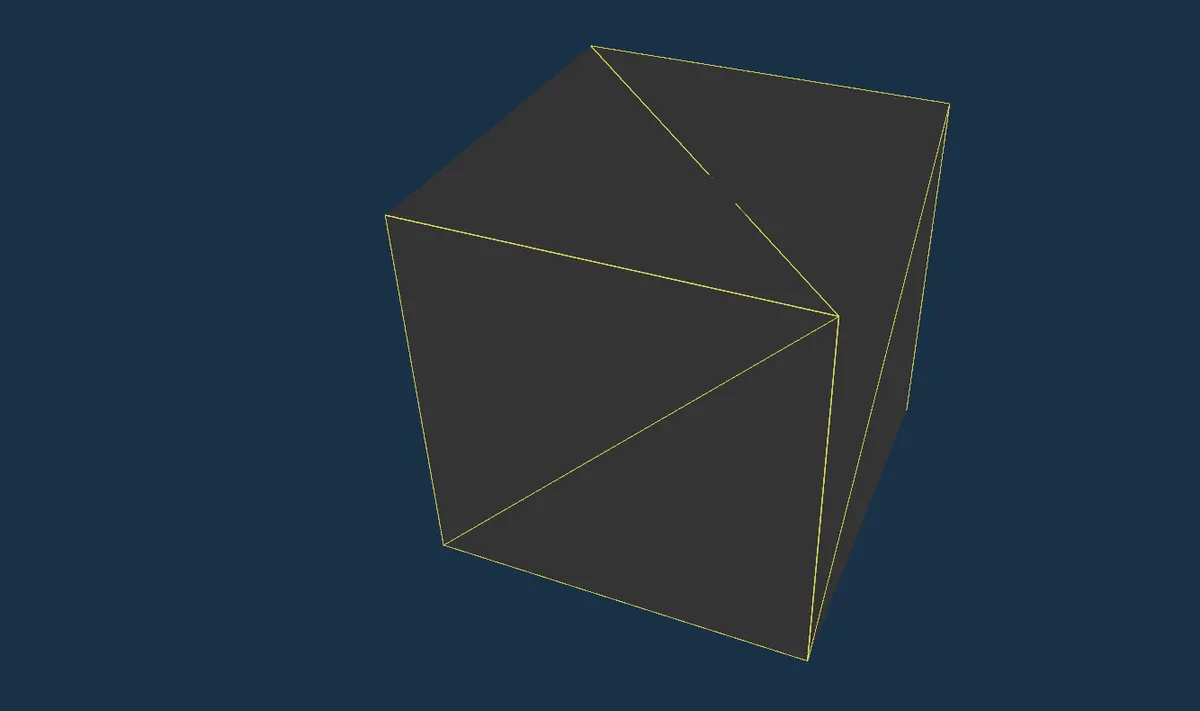 외곽선이 표시된다.
해당 외곽선은 그러나 뭔가 어색하다. 선이 그어지지 않은 부분이 있다. LineSegments는 연속된 두 개의 정점 단위로 하나의 선을 그리기 때문이다.
WireframeGeometry를 대신 사용하면 원하는 외곽선을 얻을 수 있다.
  private addOutline(geometry: THREE.BufferGeometry) {
    const matLine = new THREE.LineBasicMaterial({
      color: 0xffff00,
    });

    // const outline = new THREE.LineSegments(geometry, matLine);
    // 와이어프레임으로 변경
    const outline = new THREE.LineSegments(
      new THREE.WireframeGeometry(geometry),
      matLine,
    );
    this.scene.add(outline);
  }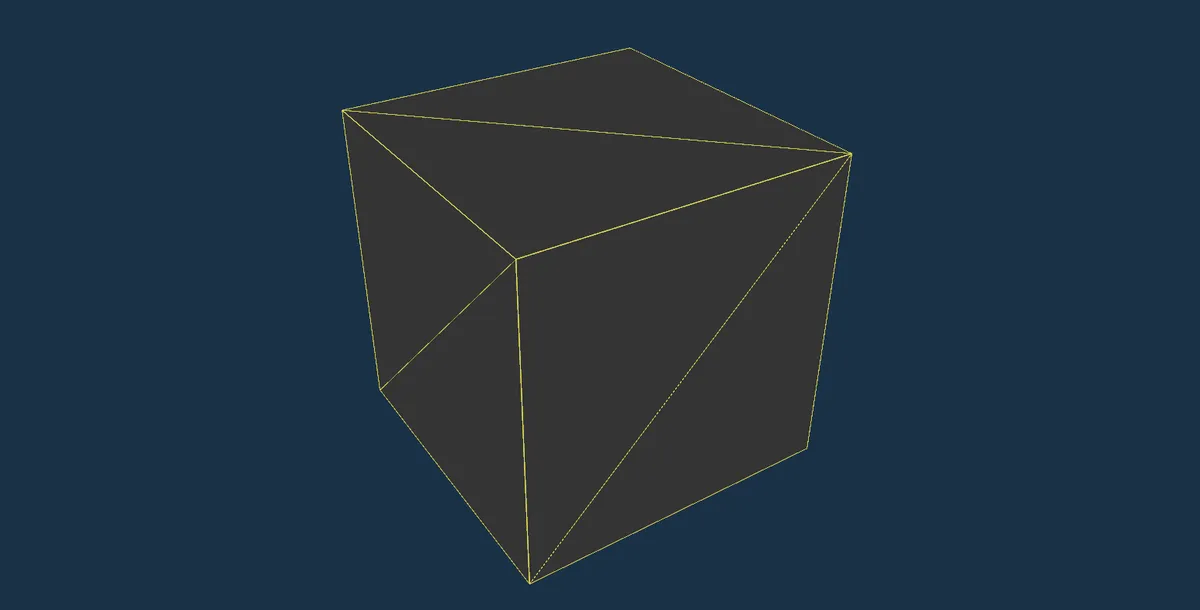
이렇게 하면 우리가 원하는 완전한 외곽선을 얻을 수 있다.
  private addOutline(geometry: THREE.BufferGeometry) {
    const matLine = new THREE.LineBasicMaterial({
      color: 0xffff00,
    });

    const outline = new THREE.LineSegments(
      new THREE.EdgesGeometry(geometry),
      matLine,
    );
    this.scene.add(outline);
  }
또는 EdgeGeometry를 써주면, Segments에 대한 외곽선 없이 깔끔한 외곽선을 얻을 수 있다.
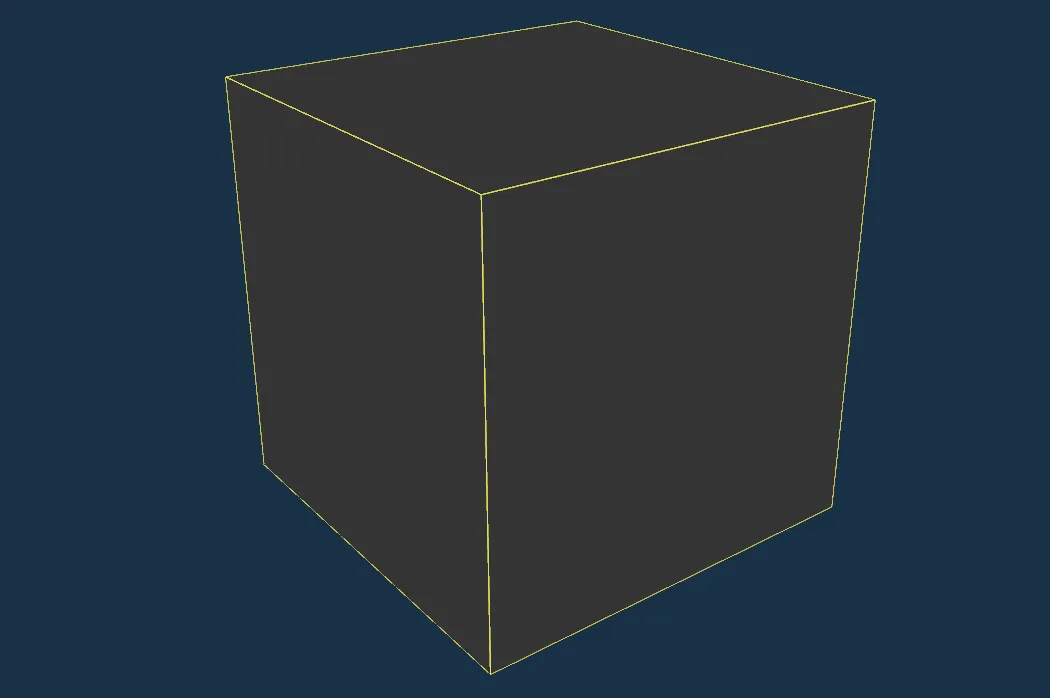 훨씬 깔끔하다.
XYZ축 추가
  private setupModel() {
    const geometry = new THREE.BoxGeometry(1, 1, 1, 1, 1, 1);
    const matFill = new THREE.MeshBasicMaterial({
      color: 0x414141,
    });
    const mesh = new THREE.Mesh(geometry, matFill);

    this.scene.add(mesh);
    this.addOutline(geometry);
  }
디폴트 값은 1이니 아무것도 적지 않으면 다음과 같은 설정일 것이다.
해당 인자값들을 만져서 설정을 다양하게 해줄 수 있다.
three.js에서는
가로방향 = X축
높이방향 = Y축
깊이방향 = Z축
이다.
해당 방향들을 알기 위해 XYZ 축을 추가해보자.
  private addAxisHelper() {
    const axisHelper = new THREE.AxesHelper(2);
    axisHelper.material.depthTest = false;
    axisHelper.renderOrder = 2;
    this.scene.add(axisHelper);
  }
축을 그리는 메서드를 먼저 추가해준다.
AxesHelper(숫자)의 인자값은 축의 크기이다.
renderOrder은 그리기 순서를 조절한다. 기본값은 0이며, 2로 지정해서 다른 모델보다 해당 축이 가장 늦게 렌더링되도록 해준다.
  private setupModel() {
    this.addAxisHelper();
    (생략)
  }
호출해준다.
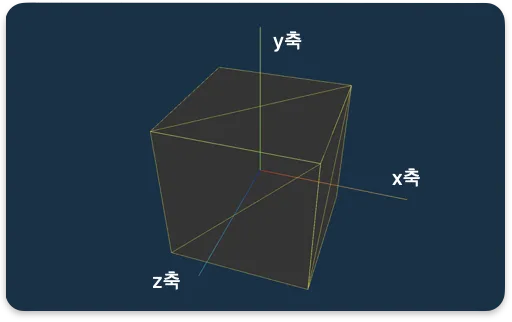 이렇게 빨,초,파 선이 생긴다.
다음 글에서는 다른 Geometry들에 대해서도 알아보자.

앱과 웹을 만들고, 직접 운영하며 기록합니다.
댓글
giscus로 동작하며 GitHub Discussions에 저장됩니다.