three.js - 보일러플레이트(2) : 상태값 업데이트, 화면 제어
2026.09.06 · 6분 읽기 · 조회 0
현재 코드
import { toneMappingExposure } from "three/tsl";
import * as THREE from "three/webgpu";

export class App {
  private renderer!: THREE.WebGPURenderer;
  private domApp!: HTMLElement;
  private scene!: THREE.Scene;
  private camera!: THREE.PerspectiveCamera;

  private constructor() {
    console.log("Hello, Three.js");
  }

  static async create(): Promise<App> {
    const app = new App();
    await app.setupThreeJs();
    app.setupCamera();
    app.setupLight();
    app.setupModel();
    app.setupEvent();
    return app;
  }

  private async setupThreeJs() {
    this.domApp = document.querySelector("#app") as HTMLElement;
    if (!this.domApp) {
      throw new Error("Could not find element with id '#app'");
    }
    const renderer = new THREE.WebGPURenderer({ antialias: true });
    renderer.toneMapping = THREE.ACESFilmicToneMapping;
    renderer.toneMappingExposure = 2;
    renderer.outputColorSpace = THREE.SRGBColorSpace;
    this.domApp.appendChild(renderer.domElement);

    await renderer.init();
    this.renderer = renderer;
    this.scene = new THREE.Scene();
  }

  private setupCamera() {
    const width = this.domApp.clientWidth;
    const height = this.domApp.clientHeight;

    this.camera = new THREE.PerspectiveCamera(60, width / height);
    this.camera.position.set(0, 0, 3);
  }

  private setupLight() {
    const light = new THREE.DirectionalLight(0xffffff, 1);
    light.position.set(-1, 2, 4);
    this.scene.add(light);
  }

  private setupModel() {
    const geometry = new THREE.BoxGeometry();
    const material = new THREE.MeshStandardMaterial();

    const mesh = new THREE.Mesh(geometry, material);
    this.scene.add(mesh);
  }

  private setupEvent() {
    window.addEventListener("resize", this.resize.bind(this));
    this.resize();

    this.renderer.setAnimationLoop(this.render.bind(this));
  }
  render() {
    this.renderer.render(this.scene, this.camera);
  }

  resize() {
    const width = this.domApp.clientWidth;
    const height = this.domApp.clientHeight;

    this.camera.aspect = width / height;
    this.camera.updateProjectionMatrix();

    this.renderer.setSize(width, height);
  }
}
상태값 업데이트 메서드
상태값 업데이트 메서드는, 렌더링 직전에 호출해서 상태값을 변경하기 위한 목적으로 사용된다.
render() {
  this.update()
  this.renderer.render(this.scene, this.camera);
}
이런 식으로 업데이트 메서드를 사용하면 될 것이다.
뭘 어떻게 상태를 변화시킨다는걸까?
 현재 상태이다. 해당
 mesh를 회전하고 싶다고 가정해보자.
그러면 회전시켜주세요 라는 코드를 update() 메서드 내부에 작성해야 한다.
먼저 해당 mesh 코드를 살펴보면,
private setupModel() {
  const geometry = new THREE.BoxGeometry();
  const material = new THREE.MeshStandardMaterial();

  const mesh = new THREE.Mesh(geometry, material);
  this.scene.add(mesh);
}
이곳에서 mesh가 선언된다. local variable이니 이를 다른 메서드에서 사용하려면,
export class App {
  private renderer!: THREE.WebGPURenderer;
  private domApp!: HTMLElement;
  private scene!: THREE.Scene;
  private camera!: THREE.PerspectiveCamera;
  private mesh!: THREE.Mesh;
}
이렇게 필드를 추가해준 후,
private setupModel() {
  const geometry = new THREE.BoxGeometry();
  const material = new THREE.MeshStandardMaterial();

  const mesh = new THREE.Mesh(geometry, material);
  this.scene.add(mesh);
  this.mesh = mesh;
}
해당 필드에 값을 직접 연결해주면 된다.
그리고 update() 내부에서 해당 mesh를 회전시키기 위한 코드를 추가해준다.
update() {
  this.mesh.rotation.y += 0.01;
}
이렇게 y축을 기점으로 회전시키는 코드를 추가하면,

이렇게 돌아간다.
회전 각도를 누적시키는 코드를 작성하여 회전시키는 것이다.
그러나 지금은 0.01이라는 상수값을 더하고 있지만, 실행 환경에 따라 회전속도가 달라질 수 있기 때문에, 모든 상황에서 동등하게 적용되는 시간 개념을 이용해야 한다.
timer
three.js는 이것을 timer라는 클래스로 제공한다.
export class App {
  (생략)
  private camera!: THREE.PerspectiveCamera;
  private mesh!: THREE.Mesh;
  private timer!: THREE.Timer;
타이머 객체를 먼저 필드에 추가해준 후,
타이머 객체를 생성한다. 이것은 setupEvent 내부에서 한다.
private setupEvent() {
  window.addEventListener("resize", this.resize.bind(this));
  this.resize();

  this.timer = new THREE.Timer();
  this.timer.connect(document);

  this.renderer.setAnimationLoop(this.render.bind(this));
}
timer 객체를 document에 연결하는 코드가 있는데, 이는 웹브라우저가 최소화되어, 3D 장면이 보이지 않다가, 다시 돌아가 장면이 보이기 시작할 때, timer 객체의 값이 튀는 현상을 막아준다고 한다.
update() {
  this.timer.update();
  const delta = this.timer.getDelta();

  this.mesh.rotation.y += delta;
}
그리고 update 메서드 내에서 timer 값을 업데이트 해주면, 시간에 대한 delta라는 값을 얻을 수 있다.
delta는 이전 프레임과 현재 프레임 간의 경과 시간이다. 단위는 ms이다.
그리고 상수였던 값에 delta를 넣어주면 어떠한 환경에서든 동일한 속도로 회전이 된다.
(짝짝짝)
배경색 바꾸기
배경색이 흰색이라서 단조로우니 다른 색으로 바꿔보자
renderer 객체를 사용하면 가능하다
private async setupThreeJs() {
  renderer.toneMapping = THREE.ACESFilmicToneMapping;
  renderer.toneMappingExposure = 2;
  renderer.outputColorSpace = THREE.SRGBColorSpace;

  renderer.setClearColor(new THREE.Color("#2c3e50"), 1);
  renderer.setPixelRatio(Math.min(window.devicePixelRatio, 2));
}
톤매핑과 컬러스페이스 아래에 이렇게 적어주었다.
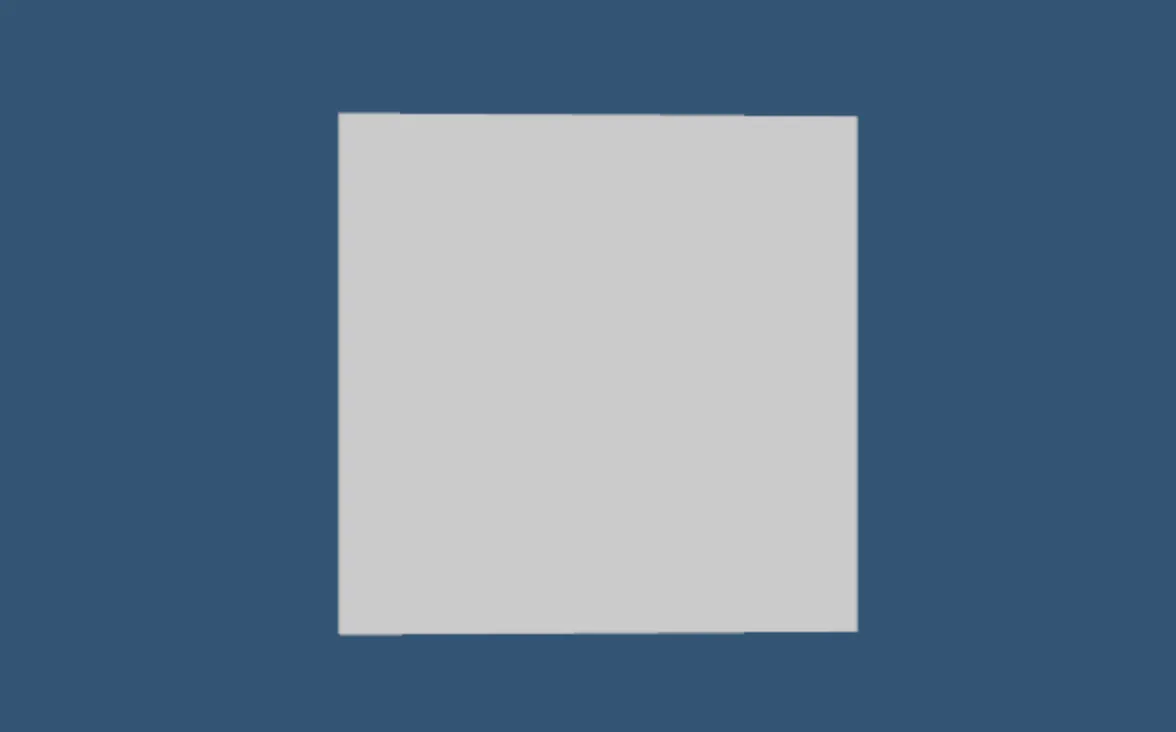 그러면 이렇게 색이 잘 바뀐다
Color('색코드')를 지정해 색을 바꿀 수 있고, 우측 숫자는 알파값(투명도)이다.
renderer.setPixelRatio(Math.min(window.devicePixelRatio, 2)); : 해당 코드는 고해상도 디바이스의 픽셀 비율에 맞게 더 높은 해상도로 렌더링 하라는 의미이다.
내부에서 min을 이용해 상한선을 2로 맞춰두었는데, 숫자가 높을 수록 화질이 좋아지나 성능에 부담이 가기 때문에 무난하게 괜찮은 2로 상한선을 맞춰주는 것이다.
자유로운 화면 제어 추가
OrbitControls
import { OrbitControls } from "three/addons/Addons.js";먼저 임포트를 해준다.
export class App {
  (생략)
  private timer!: THREE.Timer;
  private orbitControls!: OrbitControls;
}
그리고 역시 필드에 추가를 해준 후,
setupControls() {
  this.orbitControls = new OrbitControls(
    this.camera,
    this.domApp as HTMLElement,
  );
}
setupControls 메서드를 만들어 필드에 객체를 연결해준다.
orbitContols는 마우스 이벤트를 처리해서 카메라를 직접 제어할 수 있다.
때문에 인자에 카메라와 마우스 이벤트를 받을 domApp을 연결해주어야 한다.
해당 메서드를 create() 에서 실행해준다.
static async create(): Promise<App> {
  const app = new App();
  await app.setupThreeJs();
  app.setupCamera();
  app.setupControls();
  app.setupLight();
  app.setupModel();
  app.setupEvent();
  return app;
}
그러면 이렇게
 마우스로 드래그가 가능하다. 확대와 축소도 가능하다.
three.js 전용 GUI 추가
three.js 전용 GUI를 이용하면 렌더링 속도인 FPS값을 확인할 수 있고, 디버깅에 필요한 여러 UI들을 추가할 수 있다.
import { Inspector } from "three/addons/inspector/Inspector.js";

export class App {
  (생략)
  renderer.inspector = new Inspector()
  (생략)
}
인스펙터를 추가한다.
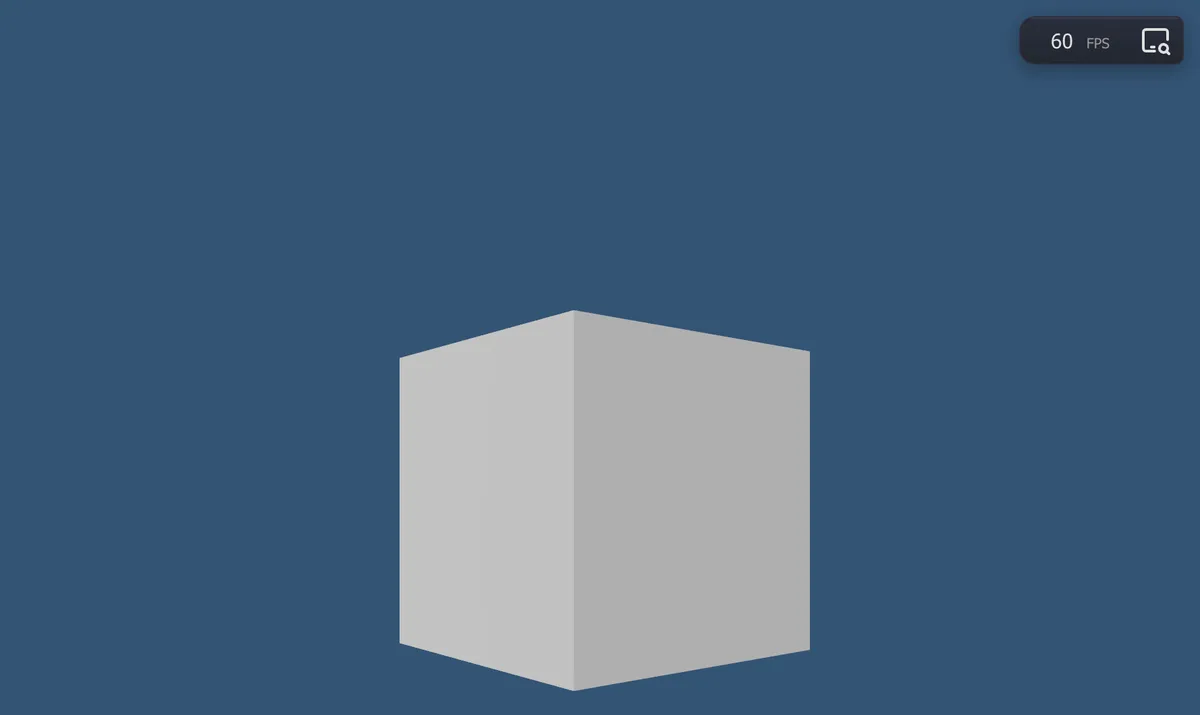
그러면 우측 상단에 FPS가 표시된다.
인스펙터에 ui를 추가해서 해당 mesh에 대한 속성들을 표시해보도록 하자.
private setupModel() {
  const geometry = new THREE.BoxGeometry();
  const material = new THREE.MeshStandardMaterial();

  const mesh = new THREE.Mesh(geometry, material);
  // gui 추가
  const gui = (this.renderer.inspector as Inspector).createParameters("설정");
  gui.add(mesh, "visible").name("보이기");

  this.scene.add(mesh);
  this.mesh = mesh;
}
setupModel 메서드에 gui를 설정이라는 이름으로 추가하고, visible 속성을 제어하는 설정을 추가한다.
mesh.visible = true 일 때 메쉬가 보이고 false일 때는 메시가 보이지 않는다.
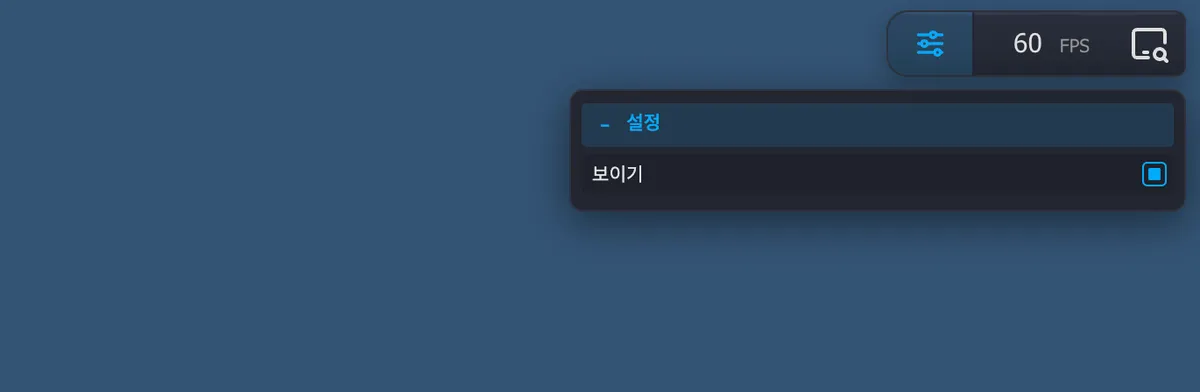 우측 상단에 보이기 버튼이 생긴다.
하지만 아직 눌러도 아무 반응이 없다. Inspector에 클릭이벤트 연결이 되지 않았기 때문이다.
setupControls() {
  this.orbitControls = new OrbitControls(
    this.camera,
    this.domApp as HTMLElement,
  );
}
이 녀석이 문제다. this.domApp as HTMLElement 로 돔 요소를 전달하고 있는데 해당 값을 this.renderer.domElement로 바꿔주어야 한다.
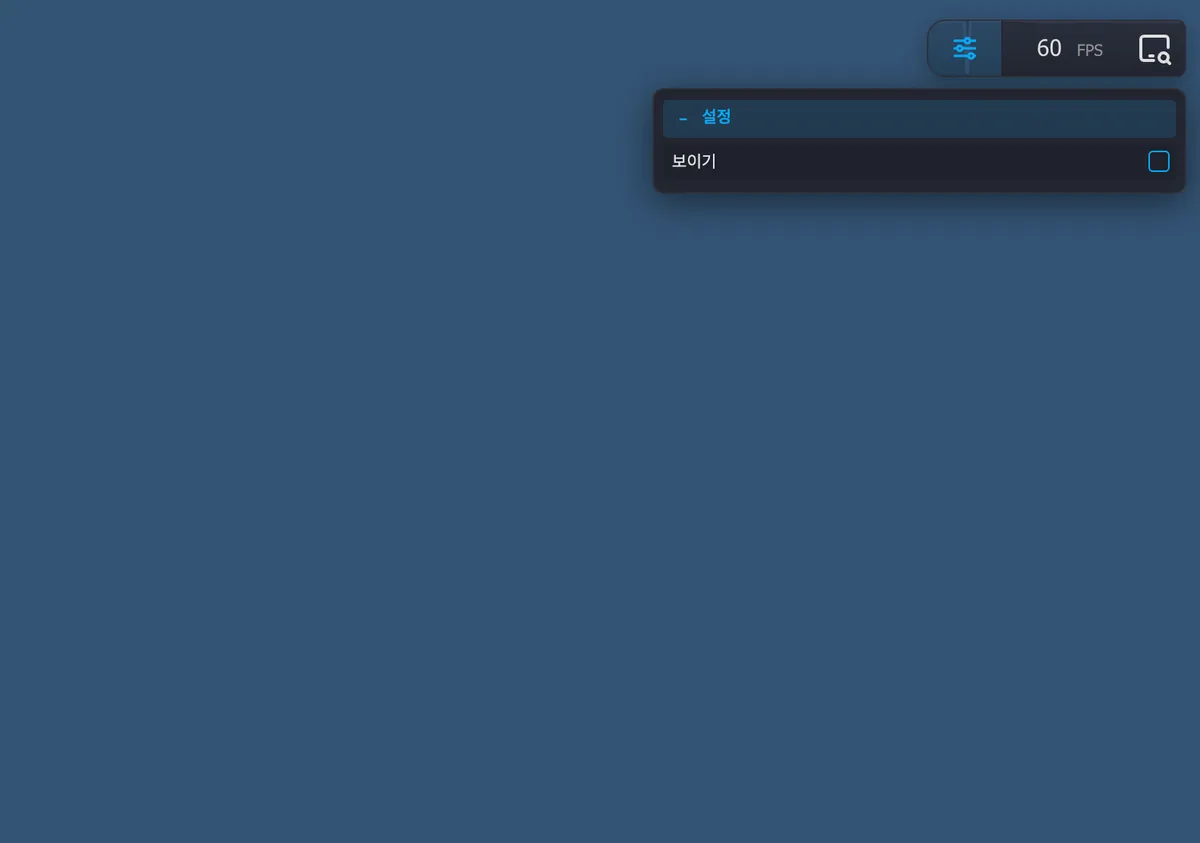
그러면 이렇게 클릭이 잘 된다! 메시가 없어진 모습을 볼 수 있다.
해당 코드까지가 앞으로 실습에 사용할 보일러플레이트이니 잘 복사해두었다가 써먹으면 되겠다.
전체 코드
// App.ts
import { toneMappingExposure } from "three/tsl";
import * as THREE from "three/webgpu";
import { OrbitControls } from "three/addons/Addons.js";
import { Inspector } from "three/addons/inspector/Inspector.js";

export class App {
  private renderer!: THREE.WebGPURenderer;
  private domApp!: HTMLElement;
  private scene!: THREE.Scene;
  private camera!: THREE.PerspectiveCamera;
  private mesh!: THREE.Mesh;
  private timer!: THREE.Timer;
  private orbitControls!: OrbitControls;

  private constructor() {
    console.log("Hello, Three.js");
  }

  static async create(): Promise<App> {
    const app = new App();
    await app.setupThreeJs();
    app.setupCamera();
    app.setupControls();
    app.setupLight();
    app.setupModel();
    app.setupEvent();
    return app;
  }

  private async setupThreeJs() {
    this.domApp = document.querySelector("#app") as HTMLElement;
    if (!this.domApp) {
      throw new Error("Could not find element with id '#app'");
    }
    const renderer = new THREE.WebGPURenderer({ antialias: true });
    renderer.toneMapping = THREE.ACESFilmicToneMapping;
    renderer.toneMappingExposure = 2;
    renderer.outputColorSpace = THREE.SRGBColorSpace;

    renderer.setClearColor(new THREE.Color("#2c3e50"), 1);
    renderer.setPixelRatio(Math.min(window.devicePixelRatio, 2));

    renderer.inspector = new Inspector();

    this.domApp.appendChild(renderer.domElement);

    await renderer.init();
    this.renderer = renderer;
    this.scene = new THREE.Scene();
  }

  private setupCamera() {
    const width = this.domApp.clientWidth;
    const height = this.domApp.clientHeight;

    this.camera = new THREE.PerspectiveCamera(60, width / height);
    this.camera.position.set(0, 0, 3);
  }

  setupControls() {
    this.orbitControls = new OrbitControls(
      this.camera,
      this.renderer.domElement,
    );
  }

  private setupLight() {
    const light = new THREE.DirectionalLight(0xffffff, 1);
    light.position.set(-1, 2, 4);
    this.scene.add(light);
  }

  private setupModel() {
    const geometry = new THREE.BoxGeometry();
    const material = new THREE.MeshStandardMaterial();

    const mesh = new THREE.Mesh(geometry, material);
    const gui = (this.renderer.inspector as Inspector).createParameters("설정");
    gui.add(mesh, "visible").name("보이기");

    this.scene.add(mesh);
    this.mesh = mesh;
  }

  private setupEvent() {
    window.addEventListener("resize", this.resize.bind(this));
    this.resize();

    this.timer = new THREE.Timer();
    this.timer.connect(document);

    this.renderer.setAnimationLoop(this.render.bind(this));
  }

  update() {
    this.timer.update();
    const delta = this.timer.getDelta();

    this.mesh.rotation.y += delta;
  }

  render() {
    this.update();
    this.renderer.render(this.scene, this.camera);
  }

  resize() {
    const width = this.domApp.clientWidth;
    const height = this.domApp.clientHeight;

    this.camera.aspect = width / height;
    this.camera.updateProjectionMatrix();

    this.renderer.setSize(width, height);
  }
}
// main.ts
import { App } from "./app";
import "./style.css";
/*const app = */ await App.create();

앱과 웹을 만들고, 직접 운영하며 기록합니다.
댓글
giscus로 동작하며 GitHub Discussions에 저장됩니다.