three.js - 기본구성요소 완성 및, 렌더링 설정
2026.08.09 · 5분 읽기 · 조회 0
현재 코드
// App.ts
import * as THREE from "three/webgpu";

export class App {
  private renderer!: THREE.WebGPURenderer;
  private domApp!: HTMLElement;

  private constructor() {
    console.log("Hello, Three.js");
  }

  static async create(): Promise<App> {
    const app = new App();
    await app.setupThreeJs();

    return app;
  }

  private async setupThreeJs() {
    this.domApp = document.querySelector("#app") as HTMLElement;
    if (!this.domApp) {
      throw new Error("Could not find element with id '#app'");
    }
    const renderer = new THREE.WebGPURenderer({ antialias: true });
    this.domApp.appendChild(renderer.domElement);

    await renderer.init();
    this.renderer = renderer;
  }
}
WebGPURenderer 가 세팅되어 있는 코드이다.
여기에 나머지 기본 구성요소들을 추가해 줄 것이다.
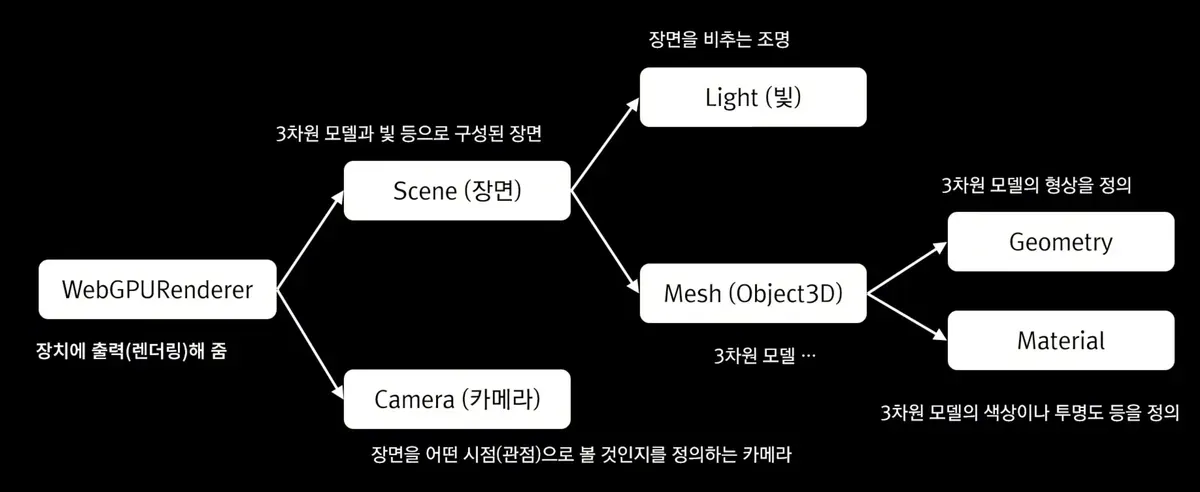
Scene
export class App {
  private renderer!: THREE.WebGPURenderer;
  private domApp!: HTMLElement;
  private scene!: THREE.Scene
  (생략)
}
scene에 대한 필드를 먼저 생성한다.
private async setupThreeJs() {
  this.domApp = document.querySelector("#app") as HTMLElement;
  if (!this.domApp) {
    throw new Error("Could not find element with id '#app'");
  }
  const renderer = new THREE.WebGPURenderer({ antialias: true });
  this.domApp.appendChild(renderer.domElement);

  await renderer.init();
  this.renderer = renderer;
  this.scene = new THREE.Scene();
}
그리고 Scene 객체를 생성한 후, 해당 필드에 할당해준다.
Camera
export class App {
  private renderer!: THREE.WebGPURenderer;
  private domApp!: HTMLElement;
  private scene!: THREE.Scene;
  private camera!: THREE.PerspectiveCamera;
}
똑같이 카메라에 대한 필드를 추가해준다.
private setupCamera() {
  const width = this.domApp.clientWidth;
  const height = this.domApp.clientHeight;

  this.camera = new THREE.PerspectiveCamera(60, width / height);
  this.camera.position.set(0, 0, 3);
}
카메라를 생성하는 메서드를 다음과 같이 정의한다.
일단 카메라의 내부 코드는 추후 자세히 알아보도록 하자.
해당 메서드는 create() 내부에서 실행해준다.
static async create(): Promise<App> {
  const app = new App();
  await app.setupThreeJs();
  app.setupCamera();
  return app;
}
Light
광원을 추가해준다.
private setupLight() {
  const light = new THREE.DirectionalLight(0xffffff, 1);
  light.position.set(-1, 2, 4);
  this.scene.add(light);
}
광원을 생성하는 메서드를 추가한다.
내부에서 light를 생성하고, scene에 추가하는 코드를 볼 수 있다.
역시 해당 메서드는 create() 내부에서 호출한다.
static async create(): Promise<App> {
  const app = new App();
  await app.setupThreeJs();
  app.setupCamera();
  app.setupLight();
  return app;
}
3차원 모델 생성(Mesh)
3D 모델을 생성하기 위해서는 Geometry와 Material 이 필요하다.
private setupModel() {
  const geometry = new THREE.BoxGeometry();
  const material = new THREE.MeshStandardMaterial();

  const mesh = new THREE.Mesh(geometry, material);
  this.scene.add(mesh);
}
내부에서 geometry 와 material을 생성한 후, mesh에 파라미터로 넣어주고, 해당 mesh를 scene에 추가한다.
역시 해당 메서드를 호출해준다.
static async create(): Promise<App> {
  const app = new App();
  await app.setupThreeJs();
  app.setupCamera();
  app.setupLight();
  app.setupModel();
  return app;
}
현재까지 풀코드
import * as THREE from "three/webgpu";

export class App {
  private renderer!: THREE.WebGPURenderer;
  private domApp!: HTMLElement;
  private scene!: THREE.Scene;
  private camera!: THREE.PerspectiveCamera;

  private constructor() {
    console.log("Hello, Three.js");
  }

  static async create(): Promise<App> {
    const app = new App();
    await app.setupThreeJs();
    app.setupCamera();
    app.setupLight();
    app.setupModel();
    return app;
  }

  private async setupThreeJs() {
    this.domApp = document.querySelector("#app") as HTMLElement;
    if (!this.domApp) {
      throw new Error("Could not find element with id '#app'");
    }
    const renderer = new THREE.WebGPURenderer({ antialias: true });
    this.domApp.appendChild(renderer.domElement);

    await renderer.init();
    this.renderer = renderer;
    this.scene = new THREE.Scene();
  }

  private setupCamera() {
    const width = this.domApp.clientWidth;
    const height = this.domApp.clientHeight;

    this.camera = new THREE.PerspectiveCamera(60, width / height);
    this.camera.position.set(0, 0, 3);
  }

  private setupLight() {
    const light = new THREE.DirectionalLight(0xffffff, 1);
    light.position.set(-1, 2, 4);
    this.scene.add(light);
  }

  private setupModel() {
    const geometry = new THREE.BoxGeometry();
    const material = new THREE.MeshStandardMaterial();

    const mesh = new THREE.Mesh(geometry, material);
    this.scene.add(mesh);
  }
}
이렇게 까지 작성하면, three.js의 기본구성요소에 대한 코드는 작성이 완료된다.
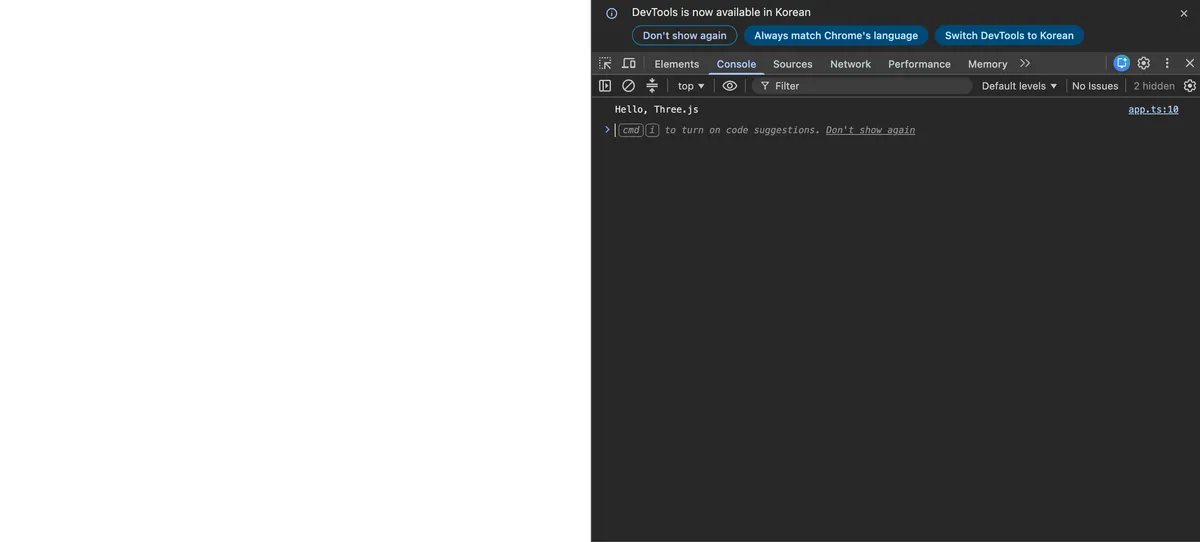
그러나 아직 화면에는 아무것도 보이지 않는다.
렌더링을 위해서는 WebGPURenderer에 렌더링 명령을 내려야 한다.
resize 이벤트 등록
이를 위해서는 이벤트와 관련된 메서드를 추가해야 한다.
private setupEvent() {
  window.addEventListener("resize", this.resize.bind(this));
  this.resize();
}
브라우저의 창 크기가 바뀔 때 마다(resize 이벤트), this.resize()를 실행하는 메서드이다.
bind(this)가 필요한 이유는, 콜백함수의 this는 window로 인식되기 때문에, 해당 this 가 지금 이 App을 가리키게 해달라고 고정시키기 위함이다.
바로 아래 this.resize()는 브라우저 실행 시 처음 한 번 실행시켜, 카메라와 렌더러의 크기를 맞춰주는 부분이다.
다음은 resize() 메서드 정의 부분이다.
resize() {
  const width = this.domApp.clientWidth;
  const height = this.domApp.clientHeight;

  this.camera.aspect = width / height;
  this.camera.updateProjectionMatrix();

  this.renderer.setSize(width, height);
}- 창 크기가 바뀌는 것을 계속 감시하고
- 카메라의 비율(
aspect)을 새 크기에 맞게 갱신한다(화면 찌그러짐 방지) this.camera.updateProjectionMatrix(): 해당 메서드를 호출해야 카메라가 실제 계산에 반영해준다.this.renderer.setSize(width, height): 렌더러(캔버스) 자체의 픽셀도 갱신해주어야 잘리지 않는다.
쉽게 정리하자면 창 크기가 바뀔 때, 카메라 비율과 캔버스 크기도 그에 맞춰 바꿔주는 코드이다.
렌더링 시켜주기
화면을 실제로 "그려라"는 명령을 내려주는 부분이다.
private setupEvent() {
  window.addEventListener("resize", this.resize.bind(this));
  this.resize();

  this.renderer.setAnimationLoop(this.render.bind(this));
}setAnimationLoop는 브라우저의 화면 주사율에 맞춰서 내부 함수를 반복 호출해준다.
this.render()를 넘겼으니, 매 프레임마다 해당 함수가 실행된다.
render() {
  this.renderer.render(this.scene, this.camera);
}
render 메서드를 정의한다.
지금 이 Scene 안에 있는 것들을, 지금 이 Camera 시점으로 한 장 찍어서 캔버스에 그려줘라는 명령이다.
해당 함수가 초당 60회 씩 호출되니, 애니메이션이 보일 수 있을 것이다.
그리고 setupEvent() 메서드를 역시 create()에서 호출해 주어야 한다.
static async create(): Promise<App> {
  const app = new App();
  await app.setupThreeJs();
  app.setupCamera();
  app.setupLight();
  app.setupModel();
  app.setupEvent();
  return app;
}
이렇게까지 하면 완성이다.

이렇게 회색 정육면체가 만들어졌다.
전체 코드
import * as THREE from "three/webgpu";

export class App {
  private renderer!: THREE.WebGPURenderer;
  private domApp!: HTMLElement;
  private scene!: THREE.Scene;
  private camera!: THREE.PerspectiveCamera;

  private constructor() {
    console.log("Hello, Three.js");
  }

  static async create(): Promise<App> {
    const app = new App();
    await app.setupThreeJs();
    app.setupCamera();
    app.setupLight();
    app.setupModel();
    app.setupEvent();
    return app;
  }

  private async setupThreeJs() {
    this.domApp = document.querySelector("#app") as HTMLElement;
    if (!this.domApp) {
      throw new Error("Could not find element with id '#app'");
    }
    const renderer = new THREE.WebGPURenderer({ antialias: true });
    this.domApp.appendChild(renderer.domElement);

    await renderer.init();
    this.renderer = renderer;
    this.scene = new THREE.Scene();
  }

  private setupCamera() {
    const width = this.domApp.clientWidth;
    const height = this.domApp.clientHeight;

    this.camera = new THREE.PerspectiveCamera(60, width / height);
    this.camera.position.set(0, 0, 3);
  }

  private setupLight() {
    const light = new THREE.DirectionalLight(0xffffff, 1);
    light.position.set(-1, 2, 4);
    this.scene.add(light);
  }

  private setupModel() {
    const geometry = new THREE.BoxGeometry();
    const material = new THREE.MeshStandardMaterial();

    const mesh = new THREE.Mesh(geometry, material);
    this.scene.add(mesh);
  }

  private setupEvent() {
    window.addEventListener("resize", this.resize.bind(this));
    this.resize();

    this.renderer.setAnimationLoop(this.render.bind(this));
  }
  render() {
    this.renderer.render(this.scene, this.camera);
  }

  resize() {
    const width = this.domApp.clientWidth;
    const height = this.domApp.clientHeight;

    this.camera.aspect = width / height;
    this.camera.updateProjectionMatrix();

    this.renderer.setSize(width, height);
  }
}
앞으로도 해당 코드에 살을 덧붙여서 발전해나갈 수 있을 것이다.

앱과 웹을 만들고, 직접 운영하며 기록합니다.
댓글
giscus로 동작하며 GitHub Discussions에 저장됩니다.